What to Use to Clean Your Computer Keyboard: A Comprehensive Guide
In today’s digital age, the computer keyboard is an essential tool for work, communication, and entertainment. However, keyboards are notorious for accumulating dust, crumbs, and germs. Knowing what to use to clean computer keyboard effectively is crucial for maintaining hygiene and prolonging the lifespan of your device. This comprehensive guide will provide you with the knowledge and techniques to keep your keyboard clean and functional.
Why Cleaning Your Keyboard Matters
Before diving into what to use to clean computer keyboard, let’s understand why regular cleaning is important:
- Hygiene: Keyboards can harbor bacteria and germs, especially in shared workspaces. Cleaning reduces the risk of spreading illnesses.
- Performance: Accumulated debris can interfere with key functionality, leading to sticky or unresponsive keys.
- Lifespan: Regular cleaning prevents the buildup of grime that can damage internal components over time.
- Aesthetics: A clean keyboard simply looks more professional and appealing.
Essential Cleaning Supplies: What You’ll Need
Now, let’s explore what to use to clean computer keyboard. Here’s a list of essential supplies:
- Compressed Air: For blasting away loose dust and debris.
- Microfiber Cloths: Soft, lint-free cloths for wiping surfaces.
- Isopropyl Alcohol (70% or higher): A disinfectant that evaporates quickly.
- Cotton Swabs: For cleaning hard-to-reach areas.
- Small Brush: A soft-bristled brush (like a toothbrush) for gently dislodging debris.
- Keycap Puller (Optional): For removing keycaps for a deeper clean.
- Vacuum Cleaner with Brush Attachment (Optional): For sucking up larger particles.
Step-by-Step Guide: How to Clean Your Keyboard
Follow these steps to effectively clean your keyboard, utilizing what to use to clean computer keyboard properly.
Step 1: Power Down and Disconnect
Always turn off your computer and disconnect the keyboard before cleaning. This prevents accidental keystrokes and electrical damage.
Step 2: Remove Loose Debris
Turn the keyboard upside down and gently shake it to dislodge loose particles. Use compressed air to blast away dust and crumbs from between the keys. Hold the can at an angle and use short bursts to avoid damaging the keyboard.
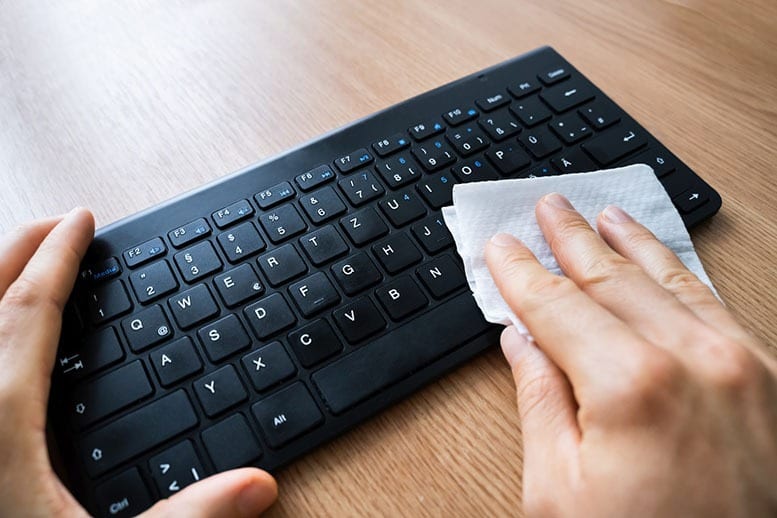
Step 3: Wipe Down the Surface
Dampen a microfiber cloth with isopropyl alcohol. Be sure the cloth is not soaking wet; it should be damp enough to clean but not dripping. Wipe down the surface of the keys and the surrounding areas. Pay attention to high-touch areas like the spacebar and frequently used keys.
Step 4: Clean Between the Keys
Use cotton swabs dipped in isopropyl alcohol to clean between the keys. Gently swipe along the edges of the keys to remove dirt and grime. A small brush can also be used to dislodge stubborn debris. Be careful not to apply too much pressure, which could damage the keys.
Step 5: Deep Cleaning (Optional)
For a more thorough cleaning, you can remove the keycaps. Use a keycap puller to gently lift the keycaps off the keyboard. Be sure to take a photo of the keyboard layout before removing the keycaps so you can easily put them back in the correct positions. Once the keycaps are removed, you can clean them with soap and water or isopropyl alcohol. Allow them to dry completely before reattaching them to the keyboard. You can also use a vacuum cleaner with a brush attachment to clean the exposed keyboard base. [See also: How to Deep Clean Your Mechanical Keyboard]
Step 6: Reassemble and Dry
If you removed the keycaps, reattach them to the keyboard, ensuring they are in the correct positions. Allow the keyboard to air dry completely before reconnecting it to your computer. This prevents any moisture from causing damage.
Choosing the Right Cleaning Products
Knowing what to use to clean computer keyboard also involves selecting the appropriate cleaning products. Here are some considerations:
- Isopropyl Alcohol: Opt for 70% or higher concentration for its disinfecting properties and quick evaporation. Avoid using stronger concentrations, as they can damage the keyboard’s finish.
- Microfiber Cloths: These cloths are gentle and won’t scratch the keyboard surface. Avoid using paper towels, as they can leave behind lint.
- Compressed Air: Use compressed air specifically designed for electronics. Avoid using canned air intended for other purposes, as it may contain propellants that can damage the keyboard.
What to Avoid When Cleaning Your Keyboard
While knowing what to use to clean computer keyboard is important, it’s equally important to know what not to use:
- Water: Avoid using plain water, as it can seep into the keyboard and cause damage.
- Harsh Chemicals: Do not use bleach, ammonia, or other harsh chemicals, as they can damage the keyboard’s finish and internal components.
- Abrasive Cleaners: Avoid using abrasive cleaners or scrub brushes, as they can scratch the keyboard surface.
- Excessive Moisture: Never spray liquids directly onto the keyboard. Always dampen a cloth or cotton swab instead.
Maintaining a Clean Keyboard
To keep your keyboard clean and functional, consider these maintenance tips:
- Regular Cleaning: Clean your keyboard at least once a week, or more frequently if you use it heavily.
- Wash Your Hands: Wash your hands before using the keyboard to prevent the transfer of dirt and germs.
- Avoid Eating and Drinking Near the Keyboard: This prevents crumbs and spills from accumulating on the keyboard.
- Use a Keyboard Cover: A keyboard cover can protect the keyboard from dust, spills, and other debris.
Troubleshooting Common Keyboard Issues
Even with regular cleaning, you may encounter keyboard issues. Here are some common problems and potential solutions:
- Sticky Keys: Sticky keys are often caused by accumulated debris. Try cleaning the affected keys with isopropyl alcohol and a cotton swab. If the problem persists, you may need to remove the keycap and clean the underlying mechanism.
- Unresponsive Keys: Unresponsive keys can be caused by a variety of factors, including debris, loose connections, or hardware failure. Try cleaning the keyboard and checking the connections. If the problem persists, you may need to consult a professional or replace the keyboard.
- Spilled Liquids: If you spill liquid on your keyboard, immediately disconnect it from the computer and turn it upside down to drain the liquid. Allow the keyboard to dry completely before reconnecting it. You may need to disassemble the keyboard and clean the internal components to prevent corrosion. [See also: What To Do If You Spill Water On Your Laptop Keyboard]
Conclusion: Keeping Your Keyboard Clean and Functional
Knowing what to use to clean computer keyboard and following a regular cleaning routine is essential for maintaining hygiene, performance, and the lifespan of your device. By using the right supplies and techniques, you can keep your keyboard clean, functional, and looking its best. Remember to prioritize safety by disconnecting the keyboard before cleaning and avoiding the use of harsh chemicals or excessive moisture. A clean keyboard is a happy keyboard, and a happy keyboard contributes to a more productive and enjoyable computing experience. So, take the time to clean your keyboard regularly, and you’ll be rewarded with a cleaner, more efficient, and longer-lasting device.
In summary, understanding what to use to clean computer keyboard involves a combination of having the right tools (compressed air, microfiber cloths, isopropyl alcohol), following a methodical cleaning process, and avoiding harmful substances. Regular maintenance will ensure your keyboard remains a reliable and hygienic tool for years to come. This guide has provided you with the knowledge to confidently tackle keyboard cleaning and keep your workspace a cleaner, healthier environment. Make keyboard cleaning a part of your routine, and you’ll notice a significant improvement in both the functionality and appearance of your device. Knowing what to use to clean computer keyboard is an investment in your productivity and well-being.
