What Takes Off Silicone Caulk: A Comprehensive Guide
Silicone caulk is a versatile sealant used in various applications, from bathrooms and kitchens to windows and doors. Its waterproof and flexible properties make it ideal for sealing gaps and preventing leaks. However, over time, silicone caulk can become discolored, cracked, or simply outdated, necessitating its removal and replacement. Removing silicone caulk can be a challenging task if you don’t know what takes off silicone caulk. This comprehensive guide will walk you through the various methods and tools available to effectively remove silicone caulk, ensuring a clean surface for reapplication.
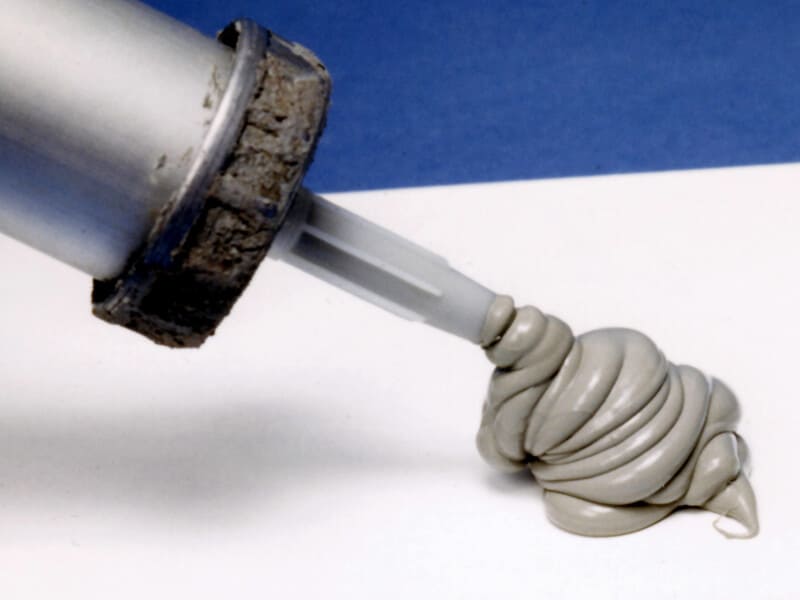
Understanding Silicone Caulk
Before diving into the removal process, it’s essential to understand what silicone caulk is and why it’s so difficult to remove. Silicone caulk is a polymer-based sealant that forms a strong, flexible bond with most surfaces. Its durability and resistance to water make it a popular choice for sealing areas prone to moisture. However, these same properties make it notoriously difficult to remove, as it doesn’t dissolve easily and adheres tightly to surfaces.
Tools and Materials Needed
To effectively remove silicone caulk, you’ll need the right tools and materials. Here’s a list of essentials:
- Utility Knife or Caulk Removal Tool: A sharp utility knife or a specialized caulk removal tool is crucial for cutting through the caulk.
- Putty Knife or Scraper: A putty knife or scraper will help you lift and remove the caulk after it has been cut.
- Silicone Caulk Remover: A chemical solvent specifically designed to soften and dissolve silicone caulk.
- Heat Gun or Hair Dryer: Applying heat can soften the caulk, making it easier to remove.
- Clean Cloths or Rags: For wiping away residue and cleaning the surface.
- Isopropyl Alcohol or Mineral Spirits: To remove any remaining silicone residue.
- Safety Glasses and Gloves: To protect your eyes and hands from chemicals and sharp tools.
Methods for Removing Silicone Caulk
There are several methods you can use to remove silicone caulk, ranging from manual techniques to chemical solutions. Here’s a breakdown of the most effective approaches:
Manual Removal
Manual removal involves using tools to physically cut and scrape away the caulk. This method is often the first step in the removal process and can be effective for removing large chunks of caulk.
- Score the Caulk: Use a utility knife or caulk removal tool to carefully score along both edges of the caulk bead. Apply firm, even pressure to cut through the caulk without damaging the surrounding surfaces.
- Peel Away the Caulk: Insert a putty knife or scraper under the scored caulk and gently lift it away from the surface. Work along the entire length of the caulk bead, applying steady pressure to peel it off.
- Remove Remaining Residue: After removing the bulk of the caulk, you’ll likely be left with some residue. Use the putty knife or scraper to carefully scrape away any remaining pieces.
Manual removal can be time-consuming and may not remove all the caulk, especially if it’s old or tightly bonded to the surface. In such cases, you may need to use additional methods.
Chemical Removal
Chemical removal involves using a silicone caulk remover to soften and dissolve the caulk. These products contain solvents that break down the silicone polymer, making it easier to remove.
- Apply Silicone Caulk Remover: Apply a generous amount of silicone caulk remover to the caulk, following the manufacturer’s instructions. Make sure to cover the entire area you want to remove.
- Allow It to Soak: Let the caulk remover sit for the recommended time, usually 30 minutes to several hours. This allows the solvent to penetrate and soften the caulk.
- Scrape Away the Caulk: After the soaking period, use a putty knife or scraper to remove the softened caulk. It should come off much easier than before.
- Clean the Surface: Wipe the surface with a clean cloth and isopropyl alcohol or mineral spirits to remove any remaining residue.
Chemical removal is often more effective than manual removal, especially for stubborn or old caulk. However, it’s essential to use these products in a well-ventilated area and wear safety glasses and gloves to protect yourself from the chemicals.
Heat Application
Applying heat to silicone caulk can soften it, making it easier to remove. This method is particularly useful for caulk that is old or tightly bonded to the surface.
- Apply Heat: Use a heat gun or hair dryer to apply heat to the caulk. Move the heat source back and forth to avoid overheating any one area.
- Scrape Away the Caulk: While the caulk is still warm, use a putty knife or scraper to remove it. The heat should make the caulk more pliable and easier to peel away.
- Clean the Surface: Wipe the surface with a clean cloth and isopropyl alcohol or mineral spirits to remove any remaining residue.
When using a heat gun, be careful not to overheat the surrounding surfaces, as this could cause damage. Always keep the heat gun moving and avoid focusing on one area for too long.
Tips for Easier Silicone Caulk Removal
Here are some additional tips to make the silicone caulk removal process easier and more efficient:
- Work in Sections: Instead of trying to remove the entire caulk bead at once, work in small sections. This makes the process more manageable and reduces the risk of damaging the surrounding surfaces.
- Use a Sharp Blade: A sharp utility knife or caulk removal tool is essential for scoring the caulk. Replace the blade frequently to ensure clean, precise cuts.
- Apply Even Pressure: When scoring and scraping the caulk, apply even pressure to avoid damaging the surrounding surfaces.
- Be Patient: Removing silicone caulk can be a time-consuming process. Be patient and take your time to avoid mistakes.
- Ventilate the Area: When using chemical caulk removers, make sure to ventilate the area to avoid inhaling harmful fumes.
- Protect Surrounding Surfaces: Use painter’s tape to protect surrounding surfaces from scratches and chemical damage.
Preventing Silicone Caulk Problems
While removing silicone caulk can be a hassle, there are steps you can take to prevent future problems:
- Choose High-Quality Caulk: Invest in high-quality silicone caulk that is designed to last.
- Proper Application: Apply the caulk correctly, ensuring a smooth, even bead.
- Regular Maintenance: Inspect the caulk regularly and repair any cracks or damage as soon as possible.
- Clean Regularly: Clean the caulk regularly to prevent the buildup of mold and mildew.
Dealing with Different Surfaces
The surface you’re removing the silicone caulk from can affect the removal process. Here’s how to approach different surfaces:
Tile
When removing silicone caulk from tile, be extra careful not to scratch or chip the tile. Use a plastic putty knife to avoid damaging the surface. [See also: How to Clean Grout]
Acrylic or Fiberglass
Acrylic and fiberglass surfaces are more susceptible to damage from chemicals and heat. Use a mild silicone caulk remover and avoid using a heat gun on these surfaces.
Painted Surfaces
When removing silicone caulk from painted surfaces, use painter’s tape to protect the surrounding paint. Be careful not to peel off the paint when removing the caulk.
Alternative Solutions for Removing Silicone Caulk
Beyond the standard methods, some alternative solutions can help in removing silicone caulk. These are worth considering if you’re facing particularly stubborn caulk or prefer a less conventional approach.
WD-40
WD-40, a common household lubricant, can sometimes be effective in loosening silicone caulk. Spray WD-40 along the edges of the caulk and let it sit for about 30 minutes. Then, try scraping the caulk away with a putty knife. The lubricant can help break the bond between the caulk and the surface.
Vinegar
White vinegar, a natural cleaning agent, can also be used to soften silicone caulk. Soak a cloth in vinegar and apply it to the caulk, letting it sit for several hours. The acidity of the vinegar can help break down the caulk, making it easier to remove. This method is best for small areas and may require multiple applications.
Citrus-Based Cleaners
Citrus-based cleaners, which contain natural solvents, can be effective in dissolving silicone caulk. Apply the cleaner to the caulk and let it sit for the recommended time, then scrape away the softened caulk. These cleaners are generally safer and more environmentally friendly than chemical caulk removers.
Safety Precautions
When removing silicone caulk, it’s crucial to prioritize safety. Here are some essential precautions to keep in mind:
- Wear Safety Glasses: Protect your eyes from flying debris and chemical splashes.
- Wear Gloves: Protect your hands from sharp tools and chemical irritants.
- Ventilate the Area: Ensure good ventilation when using chemical caulk removers to avoid inhaling harmful fumes.
- Read Product Labels: Always read and follow the manufacturer’s instructions for any chemical products you use.
- Dispose of Waste Properly: Dispose of used caulk, cloths, and chemical containers according to local regulations.
Conclusion
Removing silicone caulk can be a challenging task, but with the right tools, methods, and patience, it’s entirely achievable. Whether you choose manual removal, chemical solutions, or heat application, understanding what takes off silicone caulk and following the steps outlined in this guide will help you remove the caulk effectively and safely. Remember to prioritize safety and take your time to avoid damaging the surrounding surfaces. By following these tips, you can ensure a clean and smooth surface for reapplication, resulting in a professional-looking finish. Once you understand what takes off silicone caulk, you can tackle the project with confidence. Knowing what takes off silicone caulk is half the battle. With the right approach, you’ll have that old caulk gone in no time. Don’t forget to consider what takes off silicone caulk in terms of safety and surface compatibility. When in doubt, test a small area first. Remember, understanding what takes off silicone caulk also means knowing when to call a professional. If the task seems too daunting, or if you’re dealing with sensitive surfaces, it’s always best to seek expert help. By understanding what takes off silicone caulk, you’re well-equipped to handle this common home maintenance task. And knowing what takes off silicone caulk also empowers you to prevent future issues through proper application and maintenance. Always research what takes off silicone caulk based on your specific needs and materials. So, next time you’re faced with old, cracked caulk, you’ll know exactly what takes off silicone caulk efficiently and safely. You now have all the knowledge you need regarding what takes off silicone caulk. Good luck!
