The Ultimate Guide to Removing Silicone Caulk Residue: A Comprehensive Approach
Silicone caulk is a versatile sealant used in numerous applications, from sealing bathtubs and sinks to filling gaps around windows and doors. However, over time, silicone caulk can degrade, become discolored, or simply need replacing. While applying new caulk is relatively straightforward, removing silicone caulk residue can be a frustrating and time-consuming task. This comprehensive guide provides a step-by-step approach to effectively removing silicone caulk residue, ensuring a clean surface for new caulk application or other finishing work.
Understanding Silicone Caulk and Its Residue
Before diving into the removal process, it’s essential to understand the nature of silicone caulk. Silicone caulk is a synthetic polymer known for its flexibility, water resistance, and adhesion properties. These characteristics make it ideal for sealing joints and preventing leaks. However, these same properties also make it challenging to remove, especially once it has fully cured and bonded to the surface.
Silicone caulk residue is the leftover material that remains after the bulk of the caulk has been removed. This residue can be thin, sticky, and difficult to grip, making it resistant to conventional cleaning methods. Factors such as the type of surface, the age of the caulk, and the original application technique can all influence the difficulty of removing silicone caulk residue.
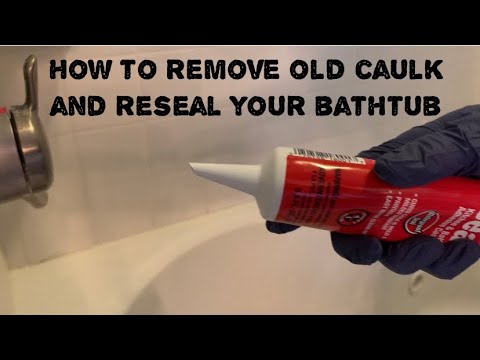
Tools and Materials Needed
To effectively remove silicone caulk residue, you’ll need a few essential tools and materials. Gathering these items beforehand will streamline the process and minimize frustration.
- Utility Knife or Caulk Removal Tool: A sharp utility knife or a specialized caulk removal tool is crucial for scoring and cutting through the caulk.
- Putty Knife or Scraper: A stiff putty knife or scraper will help to lift and remove the bulk of the caulk and stubborn residue.
- Silicone Caulk Remover Solvent: Chemical solvents specifically designed for removing silicone caulk residue can significantly soften the caulk, making it easier to scrape away.
- Mineral Spirits or Isopropyl Alcohol: These solvents can help to dissolve remaining residue and clean the surface.
- Soft Cloths or Rags: Use soft cloths or rags to apply solvents and wipe away residue.
- Safety Glasses and Gloves: Protect your eyes and skin from chemical solvents and sharp tools.
- Ventilation: Ensure proper ventilation in the work area, especially when using chemical solvents.
Step-by-Step Guide to Removing Silicone Caulk Residue
Follow these steps to effectively remove silicone caulk residue and prepare the surface for recaulking or other finishing work.
Step 1: Scoring and Cutting the Caulk
Begin by using a utility knife or caulk removal tool to score along both edges of the caulk bead. Apply firm, even pressure to cut through the caulk without damaging the underlying surface. Make multiple passes if necessary to ensure a complete cut. This step helps to separate the caulk from the surface, making it easier to remove in larger pieces. Be extremely careful when using a utility knife to avoid cuts. Consider a specialized caulk removal tool for added safety and precision.
Step 2: Removing the Bulk of the Caulk
Once the caulk is scored, use a putty knife or scraper to lift and remove the bulk of the caulk. Insert the blade under the caulk and apply gentle pressure to pry it away from the surface. Work along the entire length of the caulk bead, removing as much material as possible. If the caulk is particularly stubborn, try using a heat gun or hairdryer to soften it before scraping. Be careful not to overheat the caulk, as this can make it stickier and more difficult to remove. Patience is key at this stage; avoid forcing the caulk, as this can damage the underlying surface.
Step 3: Applying Silicone Caulk Remover Solvent
After removing the bulk of the caulk, silicone caulk residue will likely remain. Apply a silicone caulk remover solvent to the residue, following the manufacturer’s instructions. These solvents typically work by breaking down the chemical bonds in the silicone, making it easier to scrape away. Allow the solvent to dwell on the residue for the recommended time, usually 15-30 minutes. Ensure adequate ventilation during this step, as the solvents can have strong odors. Always wear gloves and safety glasses to protect your skin and eyes.
Step 4: Scraping Away the Residue
Once the solvent has had time to work, use a putty knife or scraper to carefully scrape away the softened silicone caulk residue. Apply gentle pressure and work in small sections, removing as much residue as possible. If the residue is still stubborn, reapply the solvent and allow it to dwell for a longer period. For particularly difficult areas, consider using a plastic scraper to avoid scratching delicate surfaces. Take your time and be thorough to ensure a clean surface.
Step 5: Cleaning the Surface
After scraping away the majority of the residue, clean the surface with mineral spirits or isopropyl alcohol to remove any remaining traces of silicone. Apply the solvent to a soft cloth and wipe the surface thoroughly. This step helps to remove any lingering residue and prepares the surface for recaulking or other finishing work. Allow the surface to dry completely before proceeding. A clean, dry surface is essential for proper adhesion of new caulk.
Step 6: Final Inspection and Touch-Ups
Once the surface is dry, inspect it carefully for any remaining silicone caulk residue. If necessary, repeat steps 3-5 to remove any stubborn areas. Use a razor blade or fine-grit sandpaper to carefully remove any small imperfections or residue that cannot be removed with solvents or scrapers. Be extremely careful when using a razor blade to avoid scratching the surface. Once you are satisfied that the surface is clean and smooth, it is ready for recaulking or other finishing work. Taking the time to thoroughly clean the surface will ensure a professional-looking result.
Alternative Methods for Removing Silicone Caulk Residue
While the above method is generally effective, there are a few alternative approaches you can try, depending on the specific situation.
- Heat Gun or Hairdryer: Applying heat can soften the silicone, making it easier to scrape away. Be careful not to overheat the caulk, as this can make it stickier.
- Vinegar: White vinegar can sometimes help to dissolve silicone caulk. Soak a cloth in vinegar and apply it to the residue for several hours before scraping.
- Baking Soda Paste: A paste made from baking soda and water can act as a mild abrasive to help remove residue. Apply the paste to the residue, let it sit for a few minutes, and then scrub with a soft cloth.
Preventing Silicone Caulk Residue in the Future
While removing silicone caulk residue can be challenging, there are steps you can take to minimize the problem in the future:
- Use High-Quality Caulk: Invest in a high-quality silicone caulk that is designed for the specific application.
- Apply Caulk Properly: Apply the caulk evenly and smoothly, avoiding excessive amounts.
- Clean Up Excess Caulk Immediately: Wipe away any excess caulk immediately after application with a damp cloth.
- Recaulk Regularly: Replace caulk before it becomes excessively degraded or damaged.
Conclusion
Removing silicone caulk residue can be a tedious task, but with the right tools, materials, and techniques, it can be accomplished effectively. By following the steps outlined in this guide, you can successfully remove silicone caulk residue and prepare surfaces for recaulking or other finishing work. Remember to prioritize safety by wearing appropriate protective gear and ensuring proper ventilation. With patience and persistence, you can achieve a clean and professional-looking result. The key is to thoroughly remove silicone caulk residue to ensure proper adhesion for the new caulk. Don’t underestimate the importance of using a silicone caulk remover for stubborn areas. Remember, proper preparation, including fully removing silicone caulk residue, is crucial for a long-lasting and effective seal. Always aim to completely remove silicone caulk residue before applying new caulk. The process of removing silicone caulk residue might seem daunting, but it’s a necessary step. Mastering the art of removing silicone caulk residue will save you time and frustration in the long run. Effectively removing silicone caulk residue is essential for a professional finish. Learn to remove silicone caulk residue like a pro. The effort put into removing silicone caulk residue pays off in the final result. Make sure you completely remove silicone caulk residue for optimal results. Don’t forget to remove silicone caulk residue before applying new caulk. When you remove silicone caulk residue properly, the new caulk adheres better.
[See also: How to Apply Silicone Caulk Like a Professional]
[See also: Choosing the Right Type of Caulk for Your Project]
