The Ultimate Guide to Lawn Mower Carburetor Cleaning Kits: Revitalize Your Engine
Is your lawn mower sputtering, struggling to start, or running rough? A dirty carburetor is often the culprit. Fortunately, a lawn mower carburetor cleaning kit can be your ticket to a smooth-running engine without the expense of professional repairs. This comprehensive guide will walk you through everything you need to know about lawn mower carburetor cleaning kits, from understanding their components to choosing the right one and using it effectively.
Why Carburetor Cleaning is Essential
The carburetor is a vital component of your lawn mower’s engine. It’s responsible for mixing air and fuel in the correct ratio, allowing the engine to combust and generate power. Over time, however, the carburetor can become clogged with dirt, debris, and fuel residue. This buildup restricts airflow and disrupts the fuel mixture, leading to various engine problems.
Symptoms of a dirty carburetor include:
- Difficulty starting
- Rough idling
- Engine stalling
- Loss of power
- Black smoke coming from the exhaust
- Poor fuel efficiency
Ignoring these symptoms can lead to further engine damage and costly repairs. Regularly cleaning your carburetor with a lawn mower carburetor cleaning kit can prevent these issues and keep your mower running smoothly.
Understanding Lawn Mower Carburetor Cleaning Kits
A typical lawn mower carburetor cleaning kit contains a variety of tools and cleaning solutions designed to remove dirt and debris from the carburetor’s intricate passages. Here’s a breakdown of the common components:
- Carburetor Cleaner Spray: This solvent is formulated to dissolve fuel residue, varnish, and other contaminants.
- Small Brushes: These brushes, often with varying sizes and stiffness, are used to scrub away stubborn deposits from the carburetor’s internal components.
- Carburetor Pick Set: These fine picks are designed to dislodge debris from small jets and passages.
- Compressed Air: Used to blow out loosened debris and ensure all passages are clear. (Note: Some kits may not include compressed air, requiring you to purchase it separately).
- Parts Diagram/Instructions: A visual guide to help you identify the carburetor’s components and reassemble it correctly.
Choosing the Right Lawn Mower Carburetor Cleaning Kit
With various lawn mower carburetor cleaning kits available, selecting the right one can seem daunting. Consider these factors when making your choice:
- Compatibility: Ensure the kit is compatible with your lawn mower’s engine type (e.g., Briggs & Stratton, Honda, etc.). Some kits are universal, while others are specifically designed for certain engine models.
- Quality of Components: Opt for a kit with high-quality cleaning solutions and durable tools. Cheap kits may contain harsh chemicals that can damage the carburetor’s components.
- Completeness: Make sure the kit includes all the necessary tools and cleaning solutions for a thorough cleaning. A kit with a parts diagram and detailed instructions is especially helpful for beginners.
- Price: Lawn mower carburetor cleaning kits range in price depending on the quality and completeness. Compare prices and read reviews before making a purchase.
Step-by-Step Guide to Cleaning Your Lawn Mower Carburetor
Cleaning your lawn mower carburetor with a lawn mower carburetor cleaning kit is a relatively straightforward process. However, it’s crucial to follow the instructions carefully and take necessary safety precautions. Here’s a general guide:
- Safety First: Disconnect the spark plug wire to prevent accidental starting. Wear safety glasses and gloves to protect yourself from chemicals and debris. Work in a well-ventilated area.
- Access the Carburetor: Locate the carburetor on your lawn mower’s engine. You may need to remove the air filter housing and other components to access it. Refer to your lawn mower’s owner’s manual for specific instructions.
- Remove the Carburetor: Carefully disconnect the fuel line and any other connections to the carburetor. Take photos or make notes of the connections to ensure proper reassembly. Loosen the bolts or screws securing the carburetor to the engine and remove it.
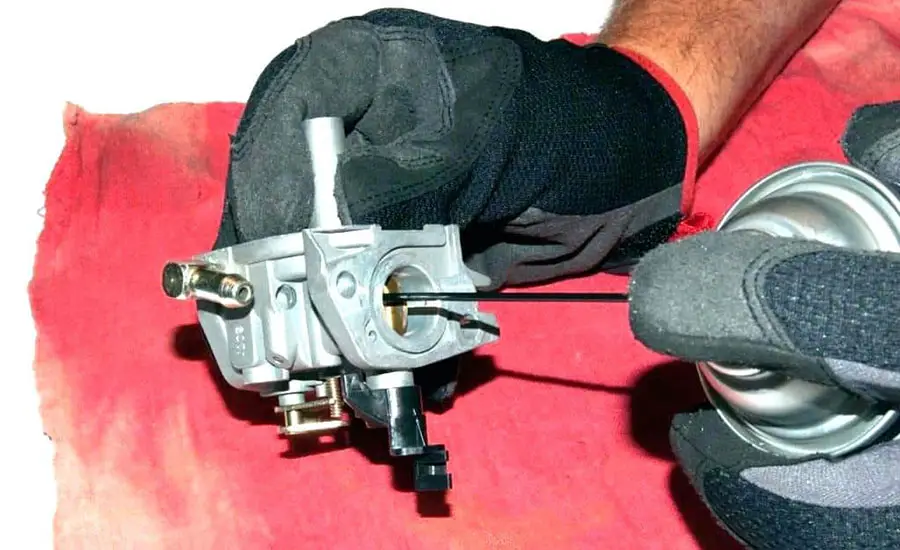
- Disassemble the Carburetor: Place the carburetor on a clean work surface. Carefully disassemble it, referring to the parts diagram in your lawn mower carburetor cleaning kit. Pay attention to the order of the components and their orientation.
- Clean the Components: Spray the carburetor cleaner onto all the carburetor’s components, including the jets, needles, and float bowl. Use the small brushes and picks to scrub away stubborn deposits. Pay close attention to the small passages and openings.
- Rinse and Dry: Rinse the components with clean carburetor cleaner and allow them to air dry. You can also use compressed air to speed up the drying process and ensure all passages are clear.
- Reassemble the Carburetor: Reassemble the carburetor in the reverse order of disassembly. Refer to your photos or notes to ensure all components are in their correct positions.
- Reinstall the Carburetor: Reinstall the carburetor onto the engine. Reconnect the fuel line and any other connections. Tighten the bolts or screws securely.
- Test the Engine: Reconnect the spark plug wire and start the engine. Allow it to run for a few minutes to ensure it’s running smoothly. Adjust the carburetor settings if necessary.
Tips for Effective Carburetor Cleaning
Here are some additional tips to ensure a successful carburetor cleaning:
- Take Your Time: Don’t rush the cleaning process. Take your time to thoroughly clean all the components.
- Use the Right Tools: Use the tools provided in your lawn mower carburetor cleaning kit. Avoid using sharp objects that could damage the carburetor’s components.
- Pay Attention to Detail: Focus on cleaning the small passages and openings, as these are most likely to become clogged.
- Replace Worn Parts: If you notice any worn or damaged parts, such as gaskets or O-rings, replace them with new ones.
- Use Fresh Fuel: After cleaning the carburetor, use fresh fuel to prevent future clogs.
When to Seek Professional Help
While cleaning your carburetor with a lawn mower carburetor cleaning kit is often effective, there are times when you may need to seek professional help. If you’re not comfortable disassembling the carburetor or if you’ve tried cleaning it multiple times without success, it’s best to consult a qualified mechanic. They can diagnose the problem and perform more complex repairs if necessary.
Beyond the Kit: Additional Maintenance Tips
Cleaning the carburetor is just one aspect of maintaining your lawn mower’s engine. Here are some additional tips to keep your mower running smoothly:
- Change the Oil Regularly: Follow the manufacturer’s recommendations for oil changes.
- Clean or Replace the Air Filter: A clean air filter ensures proper airflow to the engine.
- Sharpen the Blades: Sharp blades provide a clean cut and reduce strain on the engine.
- Store the Mower Properly: Drain the fuel tank and stabilize the fuel before storing the mower for the winter.
Conclusion
A lawn mower carburetor cleaning kit is an essential tool for maintaining your lawn mower’s engine. By understanding the components of the kit, choosing the right one, and following the cleaning instructions carefully, you can keep your mower running smoothly and avoid costly repairs. Regular maintenance, including carburetor cleaning, will extend the life of your lawn mower and ensure a beautiful lawn for years to come. Remember to always prioritize safety and consult a professional if you’re unsure about any aspect of the cleaning process. Maintaining your equipment properly will save you time and money in the long run. [See also: Lawn Mower Maintenance Schedule] and [See also: Troubleshooting Lawn Mower Problems]
