The Best Way to Remove Silicone Caulk: A Comprehensive Guide
Silicone caulk is a versatile sealant used in bathrooms, kitchens, and various other areas to create waterproof barriers. However, over time, it can become discolored, cracked, or simply outdated, necessitating its removal and replacement. Knowing the best way to remove silicone caulk is essential for any homeowner or DIY enthusiast looking to maintain the aesthetic appeal and functionality of their spaces. This comprehensive guide will walk you through the tools, techniques, and safety precautions required to effectively remove old silicone caulk without damaging the underlying surfaces.
Understanding Silicone Caulk and Why Removal Is Necessary
Silicone caulk is a flexible, durable material that provides a watertight seal. It’s commonly used around sinks, bathtubs, showers, and windows. While it offers excellent protection against water damage, silicone caulk is not impervious to wear and tear. Exposure to moisture, temperature fluctuations, and cleaning agents can cause it to degrade over time. Signs that indicate the need for silicone caulk removal include:
- Cracking or splitting
- Discoloration (mold or mildew growth)
- Loss of adhesion
- General wear and tear
Ignoring these signs can lead to water leaks, which can cause significant damage to walls, floors, and ceilings. Therefore, knowing the best way to remove silicone caulk and replace it with a fresh application is crucial for maintaining a healthy and structurally sound home.
Essential Tools and Materials for Silicone Caulk Removal
Before embarking on the removal process, gather the necessary tools and materials. Having everything on hand will streamline the task and ensure a more efficient and effective outcome. Here’s a list of essential items:
- Utility Knife or Caulk Removal Tool: A sharp utility knife or specialized caulk removal tool is essential for slicing through the old caulk.
- Putty Knife or Scraper: A putty knife or scraper will help you lift and remove the loosened caulk.
- Pliers or Needle-Nose Pliers: These tools are useful for gripping and pulling away stubborn pieces of caulk.
- Heat Gun or Hair Dryer: Applying heat can soften the caulk, making it easier to remove. (Use with caution to avoid damaging surfaces.)
- Solvent or Caulk Remover: Chemical solvents designed for caulk removal can dissolve the remaining residue. Options include mineral spirits, rubbing alcohol, or specialized caulk remover products.
- Cleaning Supplies: A clean cloth, sponge, and cleaning solution (such as vinegar or mild detergent) are needed to prepare the surface for new caulk.
- Safety Gear: Safety glasses and gloves are essential to protect your eyes and skin from debris and chemical irritants.
Step-by-Step Guide: The Best Way to Remove Silicone Caulk
Now, let’s delve into the step-by-step process of removing silicone caulk effectively:
Step 1: Prepare the Area
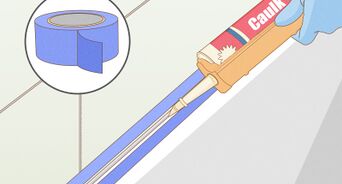
Begin by clearing the area around the caulk you intend to remove. Cover any nearby surfaces with drop cloths or plastic sheeting to protect them from debris and solvents. Ensure the area is well-ventilated, especially if you plan to use chemical solvents. Put on your safety glasses and gloves.
Step 2: Soften the Caulk (Optional)
If the caulk is particularly hard or brittle, applying heat can soften it and make it easier to remove. Use a heat gun or hair dryer on a low setting and direct the heat along the caulk line for a few seconds at a time. Avoid overheating, as this could damage the underlying surface. Alternatively, you can skip this step and proceed directly to cutting the caulk.
Step 3: Cut the Caulk
Using a sharp utility knife or caulk removal tool, carefully slice along both edges of the caulk bead. Apply steady pressure and maintain a consistent angle to avoid damaging the surrounding surfaces. If you’re using a utility knife, be extremely cautious to prevent accidental cuts. Make sure to cut deep enough to separate the caulk from the surface it’s adhered to. This is a crucial step in finding the best way to remove silicone caulk.
Step 4: Remove the Bulk of the Caulk
Once you’ve cut along the edges, use a putty knife or scraper to gently lift and peel away the bulk of the caulk. Start at one end and work your way along the entire length of the caulk line. If the caulk is stubborn, use pliers or needle-nose pliers to grip and pull it away in sections. Avoid using excessive force, as this could damage the surface beneath.
Step 5: Remove Remaining Residue
After removing the bulk of the caulk, you’ll likely be left with some residue. This is where a solvent or caulk remover comes in handy. Apply the solvent to the remaining residue, following the manufacturer’s instructions. Allow the solvent to sit for the recommended amount of time (usually a few minutes) to soften the residue. Then, use a scraper or putty knife to gently remove the softened residue. For particularly stubborn residue, you may need to repeat this process.
Step 6: Clean the Surface
Once you’ve removed all the caulk and residue, thoroughly clean the surface with a clean cloth, sponge, and cleaning solution. This will remove any remaining solvent, dirt, or grime and prepare the surface for the new caulk. Ensure the surface is completely dry before applying new caulk.
Tips and Tricks for Effective Silicone Caulk Removal
Here are some additional tips and tricks to help you achieve the best way to remove silicone caulk:
- Work in Sections: Instead of trying to remove the entire caulk line at once, work in smaller sections. This will give you more control and reduce the risk of damaging the surface.
- Use the Right Tool for the Job: Using the appropriate tools, such as a specialized caulk removal tool, can make the task much easier and more efficient.
- Be Patient: Removing silicone caulk can be a time-consuming process, so be patient and avoid rushing. Rushing can lead to mistakes and potential damage.
- Test Solvents in an Inconspicuous Area: Before applying a solvent to the entire surface, test it in a small, inconspicuous area to ensure it doesn’t damage the material.
- Consider Professional Help: If you’re uncomfortable removing silicone caulk yourself or if you’re dealing with a large or complex area, consider hiring a professional.
Safety Precautions When Removing Silicone Caulk
Safety should always be a top priority when undertaking any DIY project. When removing silicone caulk, be sure to follow these safety precautions:
- Wear Safety Glasses and Gloves: Protect your eyes and skin from debris and chemical irritants by wearing safety glasses and gloves.
- Ensure Proper Ventilation: Work in a well-ventilated area, especially when using chemical solvents.
- Avoid Overheating: When using a heat gun or hair dryer, avoid overheating the caulk or the surrounding surfaces.
- Dispose of Materials Properly: Dispose of old caulk, solvents, and cleaning materials according to local regulations.
- Read and Follow Manufacturer’s Instructions: Always read and follow the manufacturer’s instructions for any tools, solvents, or caulk removers you use.
Choosing the Right Replacement Caulk
Once you’ve successfully removed the old silicone caulk, it’s time to replace it with a fresh application. Choosing the right type of caulk is crucial for ensuring a long-lasting and effective seal. Consider the following factors when selecting a replacement caulk:
- Type of Material: Choose a caulk that is compatible with the materials you’re sealing (e.g., ceramic, porcelain, acrylic).
- Location: Select a caulk that is specifically designed for the intended location (e.g., bathroom, kitchen, exterior).
- Mold and Mildew Resistance: Opt for a caulk that contains mold and mildew inhibitors, especially for areas prone to moisture.
- Color: Choose a caulk color that complements the surrounding surfaces.
- Silicone vs. Acrylic: Silicone caulk is generally more durable and water-resistant than acrylic caulk, making it a better choice for areas exposed to moisture. However, acrylic caulk is easier to paint.
By carefully considering these factors, you can choose the right replacement caulk for your specific needs and ensure a professional-looking and long-lasting seal. [See also: How to Apply Caulk Like a Pro]
Conclusion
Removing silicone caulk may seem like a daunting task, but by following this comprehensive guide and using the right tools and techniques, you can achieve professional-looking results. Remember to prioritize safety, be patient, and choose the right replacement caulk for your specific needs. Knowing the best way to remove silicone caulk is a valuable skill for any homeowner or DIY enthusiast, allowing you to maintain the beauty and functionality of your home for years to come. Proper preparation and attention to detail are key to successfully removing old caulk and creating a clean, fresh surface for a new application. With practice and patience, you’ll master the art of caulk removal and enjoy the benefits of a well-sealed and aesthetically pleasing home.
