Removing Silicone: A Comprehensive Guide to Safe and Effective Techniques
Silicone, a versatile polymer, finds widespread application in various industries, from construction and automotive to healthcare and consumer goods. Its durability, flexibility, and resistance to extreme temperatures make it an ideal sealant, adhesive, and lubricant. However, situations arise where removing silicone becomes necessary. Whether it’s a botched DIY project, outdated sealant, or the need to replace a component, understanding the proper techniques for removing silicone is crucial to avoid damage and ensure a clean surface for subsequent applications.
This guide provides a comprehensive overview of the methods and tools required for successfully removing silicone from different surfaces. We will explore various techniques, ranging from manual scraping to chemical solvents, and offer practical tips to minimize damage and maximize efficiency. We’ll also discuss safety precautions and best practices to ensure a smooth and effective silicone removal process.
Understanding Silicone and Its Adhesion
Before delving into the methods of removing silicone, it’s essential to understand its properties and how it adheres to surfaces. Silicone sealants and adhesives typically form a strong bond with materials like glass, metal, ceramic, and plastic. This adhesion is achieved through a combination of mechanical interlocking and chemical bonding. Mechanical interlocking occurs when the silicone penetrates microscopic irregularities on the surface, creating a physical grip. Chemical bonding involves the formation of weak chemical bonds between the silicone and the surface material. Understanding these mechanisms helps in selecting the most appropriate silicone removal technique.
Tools and Materials for Removing Silicone
The effectiveness of removing silicone largely depends on having the right tools and materials. Here’s a list of essentials:
- Scrapers: A variety of scrapers, including plastic, metal, and razor scrapers, are useful for physically removing silicone. Plastic scrapers are less likely to scratch delicate surfaces, while metal scrapers provide more aggressive removal power. Razor scrapers, with their sharp blades, are effective for cutting through thick layers of silicone.
- Solvents: Chemical solvents designed for silicone removal can soften and dissolve the sealant, making it easier to scrape away. Common solvents include mineral spirits, acetone, and specialized silicone removers. Always test the solvent on an inconspicuous area first to ensure it doesn’t damage the underlying surface.
- Heat Gun or Hair Dryer: Applying heat can soften the silicone, making it more pliable and easier to remove. A heat gun is more effective but requires caution to avoid overheating and damaging the surface. A hair dryer provides a gentler heat source.
- Utility Knife: A sharp utility knife is useful for scoring along the edges of the silicone bead, separating it from the surrounding surface. This helps to prevent tearing and makes the silicone removal process cleaner.
- Clean Rags or Paper Towels: Essential for wiping away residue and cleaning the surface after removing silicone.
- Protective Gear: Safety glasses and gloves are crucial to protect your eyes and skin from chemical solvents and sharp tools.
Methods for Removing Silicone
Several methods can be employed for removing silicone, each with its advantages and disadvantages. The choice of method depends on the type of surface, the thickness of the silicone, and the desired level of cleanliness.
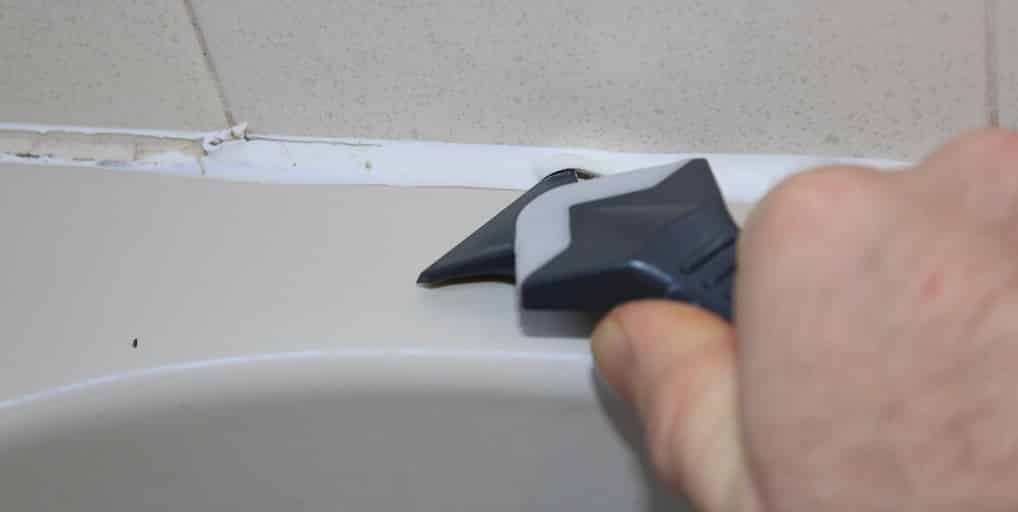
Manual Scraping
Manual scraping is the most basic method for removing silicone. It involves using a scraper to physically lift and peel away the sealant. This method is best suited for relatively thin layers of silicone and surfaces that are not easily scratched.
- Prepare the Surface: Clean the area around the silicone with a mild detergent and water to remove any dirt or debris.
- Score the Edges: Use a utility knife to carefully score along the edges of the silicone bead, separating it from the surrounding surface.
- Scrape Away the Silicone: Insert the scraper under the edge of the silicone and gently push it forward, lifting the sealant away from the surface. Use a plastic scraper for delicate surfaces and a metal scraper for more stubborn areas.
- Clean Up Residue: After removing silicone, use a clean rag dampened with mineral spirits or acetone to wipe away any remaining residue.
Using Chemical Solvents
Chemical solvents can soften and dissolve silicone, making it easier to remove. This method is particularly effective for thick layers of silicone or areas that are difficult to reach with a scraper.
- Apply the Solvent: Apply the solvent to the silicone, ensuring it is thoroughly saturated. Follow the manufacturer’s instructions for application and safety precautions.
- Allow the Solvent to Dwell: Let the solvent dwell for the recommended time, typically 15-30 minutes. This allows the solvent to penetrate and soften the silicone.
- Scrape Away the Silicone: Use a scraper to remove the softened silicone. The sealant should now be much easier to lift and peel away.
- Clean Up Residue: After removing silicone, use a clean rag dampened with the solvent to wipe away any remaining residue. Rinse the surface with water and dry thoroughly.
Applying Heat
Applying heat can soften silicone, making it more pliable and easier to remove. This method is best used in conjunction with scraping.
- Apply Heat: Use a heat gun or hair dryer to gently heat the silicone. Keep the heat source moving to avoid overheating and damaging the surface.
- Scrape Away the Silicone: While the silicone is still warm, use a scraper to remove it. The sealant should now be more flexible and easier to lift away.
- Clean Up Residue: After removing silicone, use a clean rag dampened with mineral spirits or acetone to wipe away any remaining residue.
Tips for Effective Silicone Removal
Here are some additional tips to help you achieve the best results when removing silicone:
- Test Solvents: Always test chemical solvents on an inconspicuous area of the surface before applying them to the entire area. This ensures that the solvent does not damage or discolor the material.
- Use the Right Scraper: Choose the appropriate scraper for the surface you are working on. Plastic scrapers are best for delicate surfaces, while metal scrapers are more effective for stubborn areas.
- Apply Even Pressure: When scraping, apply even pressure to avoid gouging or scratching the surface.
- Work in Sections: Divide the area into smaller sections and work on each section individually. This makes the silicone removal process more manageable and efficient.
- Be Patient: Removing silicone can be a time-consuming process. Be patient and avoid rushing, as this can lead to mistakes and damage to the surface.
- Ventilate the Area: When using chemical solvents, ensure adequate ventilation to avoid inhaling harmful fumes.
- Consider Professional Help: If you are struggling to remove silicone or are concerned about damaging the surface, consider hiring a professional.
Safety Precautions
When removing silicone, it’s essential to prioritize safety. Here are some important precautions to keep in mind:
- Wear Protective Gear: Always wear safety glasses and gloves to protect your eyes and skin from chemical solvents and sharp tools.
- Ventilate the Area: When using chemical solvents, ensure adequate ventilation to avoid inhaling harmful fumes. Open windows and doors, or use a fan to circulate the air.
- Avoid Contact with Skin and Eyes: Chemical solvents can cause irritation and burns. Avoid contact with skin and eyes. If contact occurs, rinse immediately with plenty of water and seek medical attention.
- Store Solvents Safely: Store chemical solvents in a cool, dry place, away from heat and open flames. Keep them out of reach of children and pets.
- Dispose of Waste Properly: Dispose of used solvents and silicone residue according to local regulations.
Alternative Silicone Removal Products
Besides the common solvents mentioned above, various specialized silicone removal products are available on the market. These products often contain a blend of solvents and surfactants designed to effectively dissolve silicone without damaging the underlying surface. When choosing a silicone removal product, consider the type of surface you are working on and the severity of the silicone adhesion. Always read and follow the manufacturer’s instructions for application and safety precautions.
Preventing Future Silicone Problems
Once you’ve successfully removed silicone, take steps to prevent future problems. When applying new silicone sealant, ensure the surface is clean, dry, and free of any residue. Use a high-quality silicone sealant that is appropriate for the application. Apply the sealant evenly and smoothly, and allow it to cure completely before exposing it to moisture or stress. Regular maintenance and inspection can also help to identify and address any potential problems before they escalate.
Conclusion
Removing silicone can be a challenging task, but with the right tools, techniques, and safety precautions, it can be done effectively and safely. By understanding the properties of silicone and its adhesion mechanisms, you can choose the most appropriate method for silicone removal. Whether you opt for manual scraping, chemical solvents, or a combination of both, remember to take your time, work carefully, and prioritize safety. With a little patience and attention to detail, you can achieve a clean and professional result. Understanding when to seek professional help is also crucial, especially when dealing with delicate surfaces or extensive silicone applications. [See also: Choosing the Right Sealant for Your Project] Remember that preventing silicone issues is as important as knowing how to remove silicone, so proper application and maintenance are key.
