How to Remove a Screw with No Head from Wood: A Comprehensive Guide
Dealing with a screw that has lost its head, especially when embedded in wood, can be incredibly frustrating. Whether you’re a seasoned woodworker or a DIY enthusiast, encountering a stripped or broken screw is almost inevitable. The good news is that removing a screw with no head from wood isn’t an impossible task. This comprehensive guide will walk you through various methods, offering practical solutions and tips to extract that stubborn screw without causing significant damage to your project.
The primary goal is to remove the offending screw while preserving the integrity of the surrounding wood. This article aims to provide a clear, step-by-step approach to tackle this common problem, enabling you to continue your woodworking or repair project with minimal interruption. Understanding the different techniques and choosing the right tool for the job are crucial for success. Let’s dive into the methods to remove a screw with no head from wood.
Understanding the Problem: Why Screws Break
Before exploring the solutions, it’s important to understand why screws break or strip in the first place. Several factors can contribute to this issue:
- Over-tightening: Applying excessive force when driving a screw can shear off the head or strip the threads.
- Incorrect Screw Size: Using a screw that’s too small for the application can lead to breakage under stress.
- Poor Quality Screws: Inferior screws made from weak materials are more prone to breaking.
- Wood Density: Driving screws into very hard wood without pre-drilling can put undue stress on the screw.
- Corrosion: Rust and corrosion can weaken the screw over time, making it more susceptible to breaking.
Essential Tools for Screw Removal
Having the right tools on hand is essential for efficiently removing a screw with no head from wood. Here are some tools you might need:
- Screw Extractors: These specialized tools are designed to grip and remove damaged screws.
- Pliers (Needle-Nose and Locking): Useful for gripping and twisting exposed screw shafts.
- Drill with Various Bits: For drilling pilot holes, creating slots, or using screw extractors.
- Rotary Tool (e.g., Dremel): For cutting slots in the screw shaft.
- Screwdrivers (Flathead and Phillips): For attempting to turn the screw if any part of the head remains.
- Hammer: For gently tapping tools into place.
- Center Punch: To create a starting point for drilling.
- Wood Glue and Dowels: For repairing any damage to the wood after screw removal.
Method 1: Using a Screw Extractor
Screw extractors, also known as screw removers, are specifically designed to remove a screw with no head from wood. Here’s how to use them:
- Prepare the Screw: Use a center punch and hammer to create a small indentation in the center of the broken screw. This will help guide the drill bit.
- Drill a Pilot Hole: Select a drill bit that is slightly smaller than the screw extractor. Drill a pilot hole into the screw, following the indentation you created.
- Insert the Screw Extractor: Insert the screw extractor into the pilot hole. Some extractors require you to tap them gently with a hammer to ensure they are securely seated.
- Turn the Extractor: Use a wrench or tap handle to slowly turn the screw extractor counterclockwise. Apply steady pressure. The extractor should grip the screw and begin to back it out of the wood.
- Remove the Screw: Continue turning until the screw is completely removed.
Important Tip: Apply gentle, consistent pressure. Forcing the extractor can break it or further damage the screw.
Method 2: Creating a Slot for a Flathead Screwdriver
If the screw is protruding slightly from the wood, you can create a slot for a flathead screwdriver. This method involves using a rotary tool to cut a groove into the exposed screw shaft.
- Prepare the Area: Ensure the area around the screw is clean and free of debris.
- Cut a Slot: Using a rotary tool with a cutting disc attachment, carefully cut a slot across the top of the screw shaft. Make the slot deep enough to accommodate a flathead screwdriver.
- Insert the Screwdriver: Insert a flathead screwdriver into the newly created slot.
- Turn the Screw: Apply pressure and turn the screwdriver counterclockwise to unscrew the broken screw.
- Remove the Screw: Continue turning until the screw is completely removed.
Safety Note: Wear safety glasses when using a rotary tool to protect your eyes from flying debris.
Method 3: Using Pliers to Grip the Screw Shaft
If a portion of the screw shaft is exposed, you can use pliers to grip and twist it out. This method works best when the screw isn’t deeply embedded in the wood.
- Grip the Screw: Use needle-nose or locking pliers to firmly grip the exposed screw shaft.
- Twist and Pull: Gently twist the pliers counterclockwise while applying upward pressure. Avoid applying excessive force, as this can break the screw further.
- Remove the Screw: Continue twisting and pulling until the screw is completely removed.
Pro Tip: Using locking pliers can provide a more secure grip and reduce the risk of slipping.
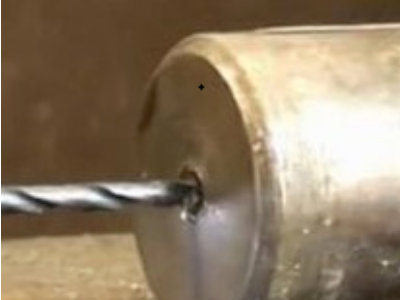
Method 4: Drilling Out the Screw
As a last resort, you can drill out the screw. This method is more invasive and may cause some damage to the surrounding wood, but it can be effective when other methods fail. It’s important to proceed carefully to minimize damage. This is a way to remove a screw with no head from wood when other methods are not working.
- Prepare the Area: Use a center punch to create an indentation in the center of the broken screw.
- Drill a Pilot Hole: Select a drill bit that is slightly smaller than the diameter of the screw. Drill a pilot hole into the screw.
- Increase Drill Bit Size: Gradually increase the size of the drill bit, drilling deeper into the screw with each pass. Be careful not to drill into the surrounding wood.
- Remove the Remnants: Once you’ve drilled out most of the screw, use a small screwdriver or pick to remove any remaining fragments.
Caution: This method can be risky, so proceed with caution and take your time.
Method 5: Using Heat to Loosen the Screw
Applying heat can sometimes help loosen a screw that is stuck due to rust or corrosion. This method involves using a soldering iron or heat gun to heat the screw, which can help break down the corrosion and make it easier to remove.
- Apply Heat: Apply heat to the screw shaft using a soldering iron or heat gun. Be careful not to overheat the surrounding wood.
- Attempt Removal: After heating the screw, try using pliers or a screw extractor to remove it.
Important: Use caution when applying heat to avoid damaging the wood or causing a fire.
Repairing the Wood After Screw Removal
After you remove a screw with no head from wood, you may need to repair the hole or any damage to the surrounding wood. Here’s how:
- Fill the Hole: Use wood glue and a wooden dowel or wood filler to fill the hole.
- Sand Smooth: Once the glue or filler is dry, sand the area smooth with fine-grit sandpaper.
- Finish: Apply a finish that matches the surrounding wood.
Preventing Broken Screws in the Future
Preventing screws from breaking in the first place is always better than having to remove them. Here are some tips to avoid broken screws:
- Pre-Drill Pilot Holes: Always pre-drill pilot holes, especially when working with hard woods.
- Use High-Quality Screws: Invest in high-quality screws made from durable materials.
- Avoid Over-Tightening: Be careful not to over-tighten screws. Use a drill with an adjustable clutch to prevent stripping.
- Lubricate Screws: Apply a small amount of lubricant to the screw threads to make them easier to drive.
Conclusion
Removing a screw with no head from wood can be a challenging task, but with the right tools and techniques, it is certainly achievable. By understanding the different methods available and choosing the one that best suits your situation, you can extract that stubborn screw and continue with your project. Remember to proceed with caution, take your time, and prioritize safety. Now you’re equipped with the knowledge to confidently remove a screw with no head from wood. [See also: Best Woodworking Techniques for Beginners] [See also: How to Choose the Right Screws for Your Project]
