How to Remove a Decal From a Car: A Comprehensive Guide
Decals on cars, whether they’re bumper stickers showcasing your favorite band, dealership advertisements, or custom graphics, can add personality and flair. However, there comes a time when you might want to remove them. Perhaps you’re selling your vehicle, updating its appearance, or simply tired of the old design. Removing a decal from a car can seem daunting, but with the right tools and techniques, it’s a manageable task. This guide provides a comprehensive, step-by-step approach to safely and effectively removing decals without damaging your car’s paint.
Understanding the Challenge of Removing Decals
The key to successful decal removal lies in understanding the adhesive bond. Decals are designed to adhere strongly to surfaces, which means simply peeling them off can leave behind sticky residue or, worse, damage the underlying paint. Factors like the decal’s age, the type of adhesive used, and the car’s exposure to sun and weather all influence how difficult the removal process will be. Properly preparing the decal and using gentle, controlled methods are crucial for achieving a clean removal.
Tools and Materials You’ll Need
Before you begin, gather the necessary tools and materials. Having everything on hand will streamline the process and minimize the risk of damaging your car’s finish. Here’s a list of essentials:
- Heat Gun or Hair Dryer: Provides gentle heat to soften the adhesive. A heat gun is more powerful but requires extra caution to avoid overheating.
- Plastic Razor Blade or Scraper: Essential for lifting the decal without scratching the paint. Avoid metal scrapers, as they can easily cause damage.
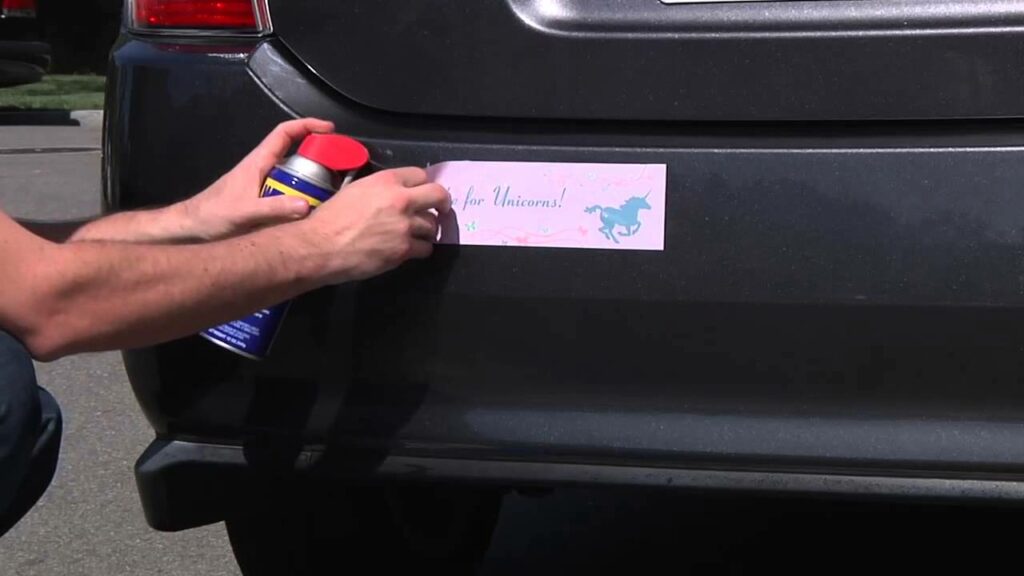
- Adhesive Remover: Products like Goo Gone, WD-40, or specialized automotive adhesive removers help dissolve stubborn residue.
- Microfiber Towels: Soft, lint-free towels for cleaning and wiping surfaces.
- Spray Bottle: For applying adhesive remover or soapy water.
- Soapy Water: A mild solution for cleaning the area before and after decal removal.
- Wax or Polish: To restore the shine and protect the paint after removing the decal.
- Gloves: To protect your hands from chemicals and heat.
Step-by-Step Guide to Removing a Decal From a Car
Step 1: Preparing the Area
Begin by washing the area around the decal with soapy water and drying it thoroughly. This removes dirt and grime that could scratch the paint during the removal process. Make sure the car’s surface is clean and dry before proceeding.
Step 2: Applying Heat
Using a heat gun or hair dryer, gently heat the decal. Hold the heat source a few inches away from the surface and move it back and forth in a sweeping motion. Avoid concentrating the heat on one spot for too long, as this could damage the paint. The goal is to soften the adhesive, making it easier to peel the decal away. Test the decal’s pliability by gently trying to lift a corner with your fingernail or a plastic razor blade.
Step 3: Lifting the Decal
Once the decal is sufficiently heated, use a plastic razor blade or scraper to carefully lift a corner of the decal. Work slowly and gently, applying heat as needed to continue softening the adhesive. Maintain a low angle with the scraper to avoid digging into the paint. If the decal tears or breaks, reheat the area and continue lifting from a different point. The key is to peel the decal off gradually, minimizing the amount of adhesive left behind.
Step 4: Removing Adhesive Residue
After removing the decal, you’ll likely be left with some adhesive residue. This is where adhesive remover comes in handy. Spray the residue with your chosen remover and let it sit for a few minutes, following the product’s instructions. Then, use a microfiber towel to gently wipe away the residue. You may need to repeat this process several times to remove all traces of adhesive. For stubborn spots, try using a plastic razor blade to gently scrape away the residue after applying the remover.
Step 5: Cleaning and Polishing
Once all the adhesive residue is removed, clean the area with soapy water to remove any remaining adhesive remover. Dry the surface thoroughly with a clean microfiber towel. Finally, apply a coat of wax or polish to restore the shine and protect the paint. This will help blend the area where the decal was with the surrounding paint, creating a seamless finish. [See also: Car Detailing Tips for Beginners]
Alternative Methods for Removing Decals
While the heat and scraper method is generally effective, there are alternative techniques you can try:
- Steam: A steamer can be used to gently heat and loosen the adhesive. Apply steam to the decal for a few seconds at a time, then try lifting it with a plastic scraper.
- Rubber Eraser Wheel: These wheels, designed for use with a drill, can quickly remove decals and adhesive residue. However, they require careful use to avoid damaging the paint. Practice on an inconspicuous area first to get a feel for the tool.
- Vinegar: White vinegar can be used as a natural adhesive remover. Soak a cloth in vinegar and apply it to the decal, allowing it to sit for several minutes before attempting to peel the decal.
Common Mistakes to Avoid
Removing a decal from a car can be tricky, and it’s easy to make mistakes that can damage your vehicle’s paint. Here are some common pitfalls to avoid:
- Using Metal Scrapers: Metal scrapers can easily scratch the paint. Always use plastic razor blades or scrapers specifically designed for automotive use.
- Applying Too Much Heat: Overheating the decal can damage the paint. Use a low heat setting and move the heat source constantly.
- Using Harsh Chemicals: Avoid using strong solvents or abrasive cleaners, as they can damage the paint or clear coat.
- Rushing the Process: Patience is key. Rushing the removal process can lead to tearing the decal and leaving behind more residue.
- Ignoring Residue: Leaving adhesive residue on the car can attract dirt and grime, making it even harder to remove later.
Preventative Measures for Future Decals
If you plan to apply new decals to your car, consider these tips to make future removal easier:
- Choose High-Quality Decals: Opt for decals made with removable adhesive. These are designed to be easier to remove without leaving behind residue.
- Apply Decal Protection Film: Applying a clear protective film over the decal can protect it from the elements and make it easier to remove.
- Regular Cleaning: Regularly cleaning your car can prevent dirt and grime from building up around the decal, making it easier to remove in the future.
When to Seek Professional Help
If you’re uncomfortable removing the decal yourself, or if you’re dealing with a particularly stubborn or large decal, consider seeking professional help. Automotive detailing shops and sign shops have the expertise and tools to safely and effectively remove decals without damaging your car’s paint. This is especially important for older or more valuable vehicles where preserving the original paint is critical. [See also: Finding a Reputable Auto Detailer]
The Importance of Patience and Care
Removing a decal from a car requires patience, care, and the right tools. By following the steps outlined in this guide and avoiding common mistakes, you can successfully remove decals without damaging your car’s paint. Remember to work slowly, apply heat gently, and use appropriate adhesive removers. With a little effort, you can restore your car’s appearance and enjoy a clean, decal-free finish. Removing a decal from a car can be a simple process if you follow these guidelines. The process of how to remove a decal from a car is made easier by using the right tools, and understanding the adhesive is key to success. Knowing how to remove a decal from a car without damaging the paint is important. Many people search for tips on how to remove a decal from a car, and this guide provides comprehensive instructions. The best method of how to remove a decal from a car depends on the decal’s age and the type of adhesive used. If you’re careful, learning how to remove a decal from a car can save you money on professional detailing services. Successfully learning how to remove a decal from a car requires attention to detail and a patient approach. Understanding how to remove a decal from a car also includes knowing when to seek professional help. If you are still unsure, it’s best to consult a professional for how to remove a decal from a car. Mastering how to remove a decal from a car is a valuable skill for any car owner. The steps for how to remove a decal from a car are outlined above. Remember, knowing how to remove a decal from a car is all about preparation and using the correct techniques.
