How to Clean Golf Club Irons: A Comprehensive Guide for Peak Performance
Maintaining your golf clubs, especially your irons, is crucial for consistent performance and extending their lifespan. Dirt, grass, and other debris can accumulate in the grooves of your irons, impacting your ball striking and overall game. Learning how to clean golf club irons properly is an essential skill for any golfer, from beginner to seasoned pro. This guide provides a step-by-step approach to keeping your irons in top condition, ensuring clean contact and optimal spin control.
Why Cleaning Your Golf Club Irons Matters
Beyond aesthetics, regularly cleaning your golf club irons offers several key benefits:
- Improved Performance: Clean grooves allow for better contact with the ball, maximizing spin and control. Dirt and debris can fill the grooves, reducing friction and leading to inconsistent shots.
- Extended Lifespan: Removing corrosive materials like dirt and moisture prevents rust and wear, prolonging the life of your irons.
- Consistent Feel: A clean clubface provides a more consistent feel upon impact, enhancing your feedback and confidence.
- Enhanced Aesthetics: Let’s face it, clean clubs simply look better and reflect pride in your equipment.
Essential Supplies for Cleaning Golf Club Irons
Before you begin, gather the following supplies:
- Warm Water: The foundation for loosening dirt and grime.
- Mild Dish Soap: A gentle cleanser that effectively removes debris without damaging the club finish.
- Soft-Bristled Brush: An old toothbrush or a specialized golf club cleaning brush works well. Avoid abrasive brushes that can scratch the clubface.
- Soft Towel: For drying your clubs after cleaning. Microfiber towels are ideal.
- Golf Club Groove Cleaner (Optional): A tool designed to remove stubborn dirt from the grooves.
- Bucket or Sink: To hold the soapy water.
Step-by-Step Guide: How to Clean Golf Club Irons
Step 1: Prepare Your Cleaning Solution
Fill a bucket or sink with warm water and add a few drops of mild dish soap. Mix the solution thoroughly.
Step 2: Soak the Club Heads
Submerge the heads of your golf club irons in the soapy water for about 5-10 minutes. This will help loosen any caked-on dirt and grime. Avoid submerging the entire club, especially the grip, as this can damage the grip’s adhesive.
Step 3: Scrub the Clubface and Grooves
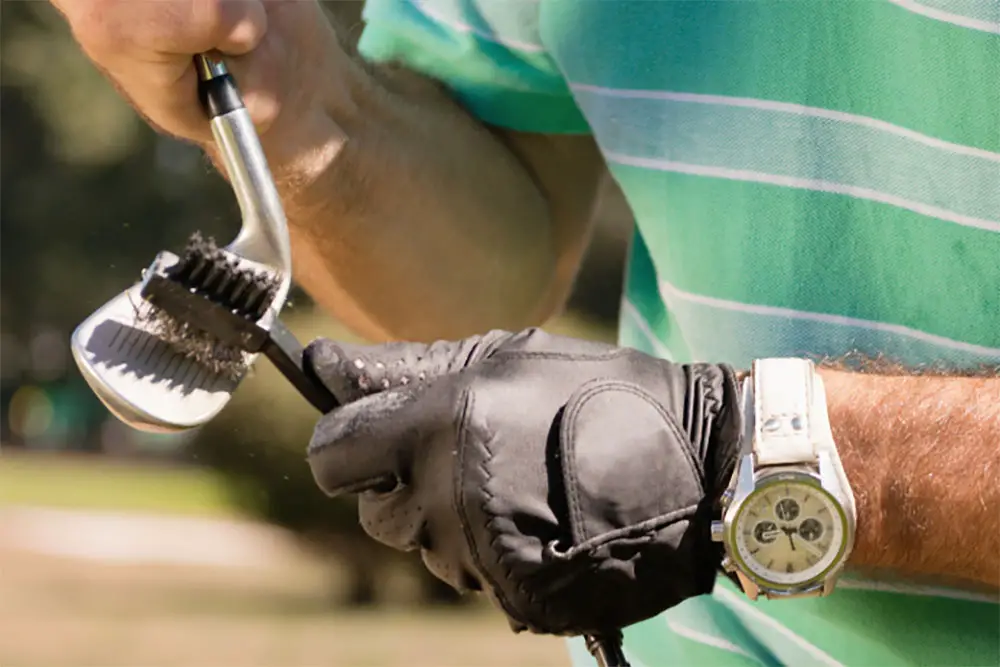
Using your soft-bristled brush, scrub the clubface and grooves thoroughly. Pay close attention to the grooves, as this is where dirt tends to accumulate. For stubborn dirt, use a golf club groove cleaner to carefully remove debris from the grooves. Work in a circular motion to ensure you reach all areas.
Step 4: Rinse Thoroughly
Rinse each iron thoroughly with clean water to remove all traces of soap and dirt. Ensure no soap residue remains, as this can affect the club’s performance.
Step 5: Dry Your Golf Club Irons
Use a soft towel to dry each iron completely. Pay close attention to drying the grooves to prevent rust. Ensure all moisture is removed before storing your clubs.
Dealing with Stubborn Dirt and Rust
Sometimes, simple soap and water aren’t enough to remove stubborn dirt or rust. Here are some additional tips:
- Baking Soda Paste: For stubborn dirt, mix baking soda with water to create a paste. Apply the paste to the affected area, let it sit for a few minutes, and then scrub with a soft-bristled brush. Rinse thoroughly.
- Vinegar Solution: For light rust, soak the clubface in a solution of equal parts white vinegar and water for about 30 minutes. Then, scrub with a soft-bristled brush and rinse thoroughly.
- Commercial Rust Remover: For more severe rust, consider using a commercial rust remover specifically designed for golf clubs. Follow the manufacturer’s instructions carefully.
Important Note: Always test any cleaning solution on a small, inconspicuous area of the club first to ensure it doesn’t damage the finish.
Preventative Measures to Keep Your Irons Clean
Prevention is always better than cure. Here are some preventative measures to help keep your irons clean:
- Wipe Down After Each Use: After each round or practice session, wipe down your irons with a damp cloth to remove loose dirt and grass.
- Use Club Head Covers: Club head covers protect your irons from scratches and dings, as well as prevent dirt from accumulating.
- Store Your Clubs Properly: Store your clubs in a dry place to prevent rust and corrosion.
- Regular Cleaning Schedule: Establish a regular cleaning schedule, such as once a month, to keep your irons in top condition.
The Importance of Clean Grips
While this guide focuses on cleaning the iron heads, don’t forget about the grips! Clean grips are just as important for maintaining a secure and comfortable hold on the club. [See also: How to Clean Golf Club Grips] Dirty grips can become slippery, affecting your swing and control. Clean your grips regularly with warm, soapy water and a soft cloth.
Professional Cleaning Services
If you’re short on time or prefer a professional touch, consider taking your golf club irons to a professional club cleaner. Many golf shops offer cleaning and repair services. This can be a great option for deep cleaning and restoring your clubs to like-new condition.
Choosing the Right Cleaning Products
When selecting cleaning products for your golf club irons, it’s essential to choose those that are specifically designed for golf clubs or are gentle enough to avoid damaging the finish. Avoid using harsh chemicals or abrasive cleaners, as these can scratch or corrode the clubface. Stick to mild dish soap, baking soda, or vinegar solutions for most cleaning tasks.
The Impact of Clean Irons on Ball Flight
The condition of your irons directly impacts the ball’s flight and spin. Clean grooves allow the clubface to grip the ball more effectively, creating backspin that helps the ball launch higher and land softer. Dirty grooves, on the other hand, can reduce spin and lead to lower, less controlled shots. By keeping your irons clean, you can ensure consistent ball flight and optimal performance on the course.
Understanding Different Iron Finishes
Golf club irons come in various finishes, including chrome, stainless steel, and carbon steel. Each finish requires slightly different care. Chrome and stainless steel are relatively easy to clean and maintain, while carbon steel requires more attention to prevent rust. Be sure to research the finish of your irons and adjust your cleaning routine accordingly.
Common Mistakes to Avoid When Cleaning Golf Club Irons
Avoid these common mistakes when cleaning your golf club irons:
- Using Abrasive Cleaners: Abrasive cleaners can scratch the clubface and damage the finish.
- Using Steel Wool: Steel wool is too abrasive and can cause permanent damage.
- Submerging the Entire Club: Submerging the entire club can damage the grip and the connection between the head and the shaft.
- Leaving Clubs Wet: Leaving clubs wet can lead to rust and corrosion.
- Ignoring the Grips: Neglecting the grips can affect your grip and control.
The Psychology of Clean Golf Clubs
Beyond the practical benefits, there’s a psychological advantage to playing with clean golf clubs. Clean clubs can boost your confidence and give you a sense of pride in your equipment. Knowing that your clubs are in top condition can help you approach each shot with greater focus and conviction. Taking the time to how to clean golf club irons is an investment in your game, both physically and mentally.
Conclusion: Mastering the Art of Cleaning Golf Club Irons
Learning how to clean golf club irons is a simple yet essential aspect of golf club maintenance. By following the steps outlined in this guide, you can keep your irons in top condition, ensuring consistent performance, extending their lifespan, and enhancing your overall golfing experience. Make cleaning your irons a regular part of your routine, and you’ll reap the rewards on the course. So grab your supplies, get cleaning, and get ready to play your best golf! Remember to always prioritize gentle cleaning methods and avoid abrasive materials that could damage your clubs. Happy golfing!
